Adding Memoji to Your Stream

Adding Memoji to Your Stream
AUGUST 18, 2019
How you can use your iPhone X to puppet an avatar for your live streaming
I'm fascinated with the entertainment innovation happening on Twitch and have put together this tutorial so you can add Memoji powered avatars to your stream.
There is such a vast community of streamers of all types on Twitch. Some who use their fame from other media to promote their identity (Jenna Marbles, Rampage Jackson, Drake). Some streamers leverage their fame as competitive gamers or use their real face/personality to help grow their audience (Shroud, Ninja, ChocoTaco). There is also another set of streamers who hide their real faces under characters they play (Dr. DisRespect, Smacetron) or don't show any webcams of themselves at all (Aculite, Wadu Hek).
Here is an easy solution to have a live animated cartoon as your Twitch personality. Using the motion capture and depth mapping on an iPhone X, you will be able to keep your identity hidden while allowing your audience to have a living breathing avatar.
Here is what it looks like when capturing a Memoji avatar and adding it directly to your live Twitch stream.
What You Need
iPhone X and AnimojiStudio
You will need an iPhone X for this to work. iPhone X has a TrueDepth camera system that detects and maps your face in an array of hidden points similar to those motion capture dots you see actors use for high dollar special effects in movies. The iPhone X camera is the secret sauce to making this all work.
Memojis are custom Pixar-looking avatars that will be coming to your iPhone X with the release of iOS 12 in September. The functionality is still in the beta stage up until then and iTunes App Store apps can't use the framework until the full release.
However, if you have an Apple Developer account, you can download and build some software that lets you easily "green screen" and isolate your custom avatar today.
A brilliant developer named Guilherme Rambo (https://twitter.com/_inside) has a GitHub repo where he's open sourced an application that we are using. 9Technically you could just use iMessage and chroma key out white, but AnimojiStudio lets you add a custom green background)
You can pull source below and build the app to your own iPhone X. (Note: does require Apple Developer account and a level of tech savvy. Ping me if you need help. Ultimately I expect there will be several apps in the App Store in September that will make it easier without the level of developer knowledge.)
https://github.com/insidegui/AnimojiStudio/tree/memoji)
Once you start the app, you are presented with a few options. You can use Classic Animoji, but for this post, we will be creating a custom Memoji. Click "Memoji".
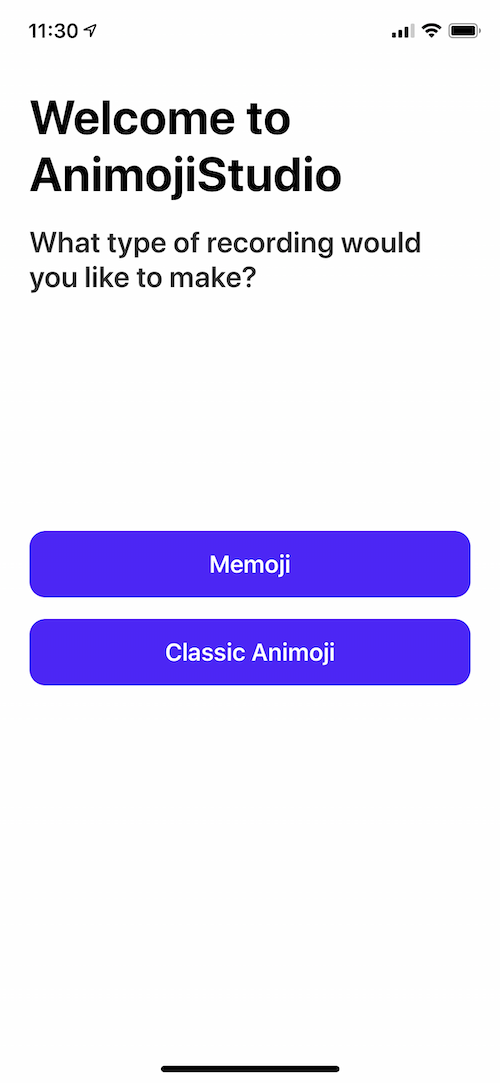

Click the blue head with the plus sign in it to step through the avatar head wizard.
Select your favorite combinations of hair, eyes, eyewear, and headgear.
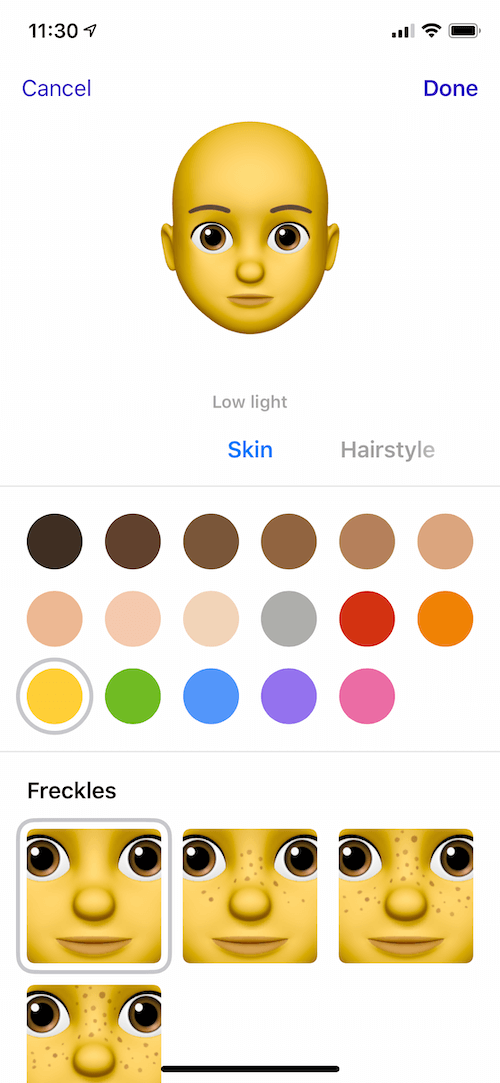
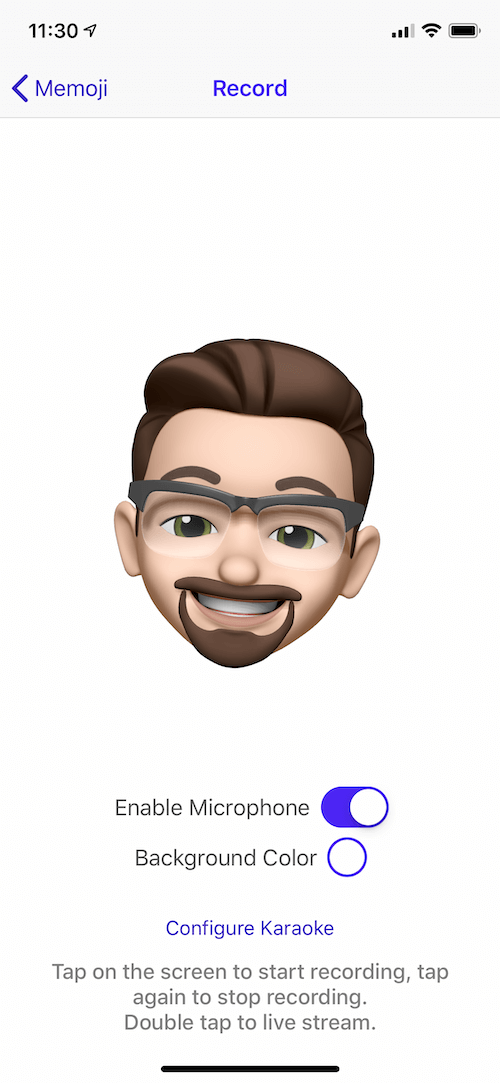
Congratulations, you've created your Memoji.
Select the Background color and move the red and blue sliders all the way to the left so the background turns green. We'll be using that color green to chroma key out so your avatar floats and has no borders.
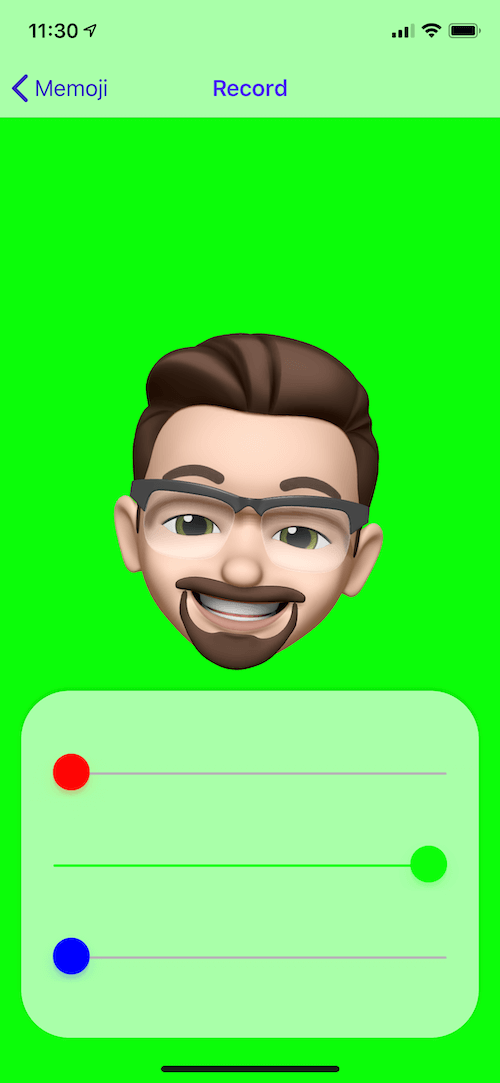
Next, let's configure your streaming software.
OBS
Next, you will need to configure your streaming software to add a new input source, and we will need to crop and chroma key your avatar to place in your stream.
Most streamers use either OBS (open source and free solution) or StreamLabs ($$) as their gameplay and video capture tool that then connects to Twitch's APIs to allow your audience to watch you live.
You'll need to physically connect your iPhone X to your streaming computer via cable. Your screen should look something like below. Under "Sources", click the add arrow and select "Video Capture Device". Name your source "IPHONE X" and select iPhone from the Device pull down.
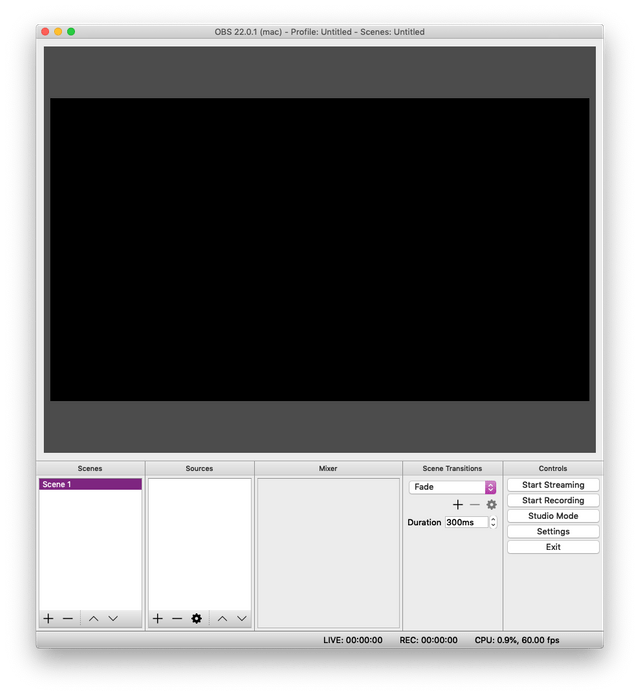
You'll see the IPHONE X now as a source on the screen and placed on stage. We will need to chroma key out the green and crop the rest of the app visibly out.
Right click the red bordered live video of your phone and select FILTERS. Under EFFECT FILTERS, click the add arrow and select Chroma Key. Leave Key Color Type to Green and click CLOSE below.
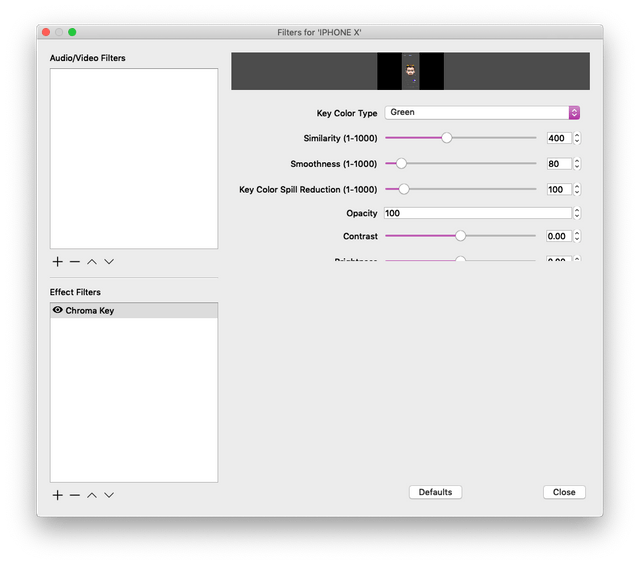
Once again, right click the red bordered live video of your phone and select FILTERS. We will be cropping app screen so select CROP/PAD from the options. I've found that making the LEFT 500, TOP 200, RIGHT 500, and BOTTOM 200, will crop everything so just your head shows. Click CLOSE.
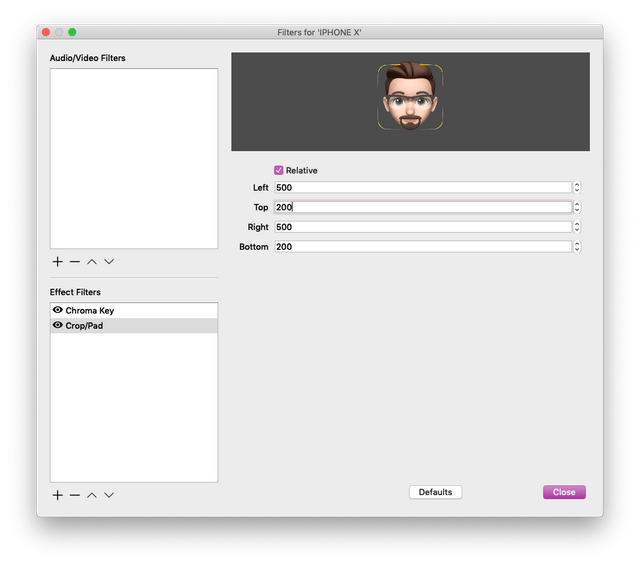
Now you've got a cropped and transparent live video of your Memoji. Place and layer with other items on your stage. If you need additional tutorial help, I'd highly recommend Nick Nimmin and his OBS tips videos. Check him on out YouTube.
The Phone/Camera Rig
One of the most annoying parts of the process is keeping the iPhone in front of your face to be able to capture your movements. Short of attaching a bicycle helmet with an arm reaching over your face, I found that a GorillaPod-like mount hanging from the front of my screen works just fine.
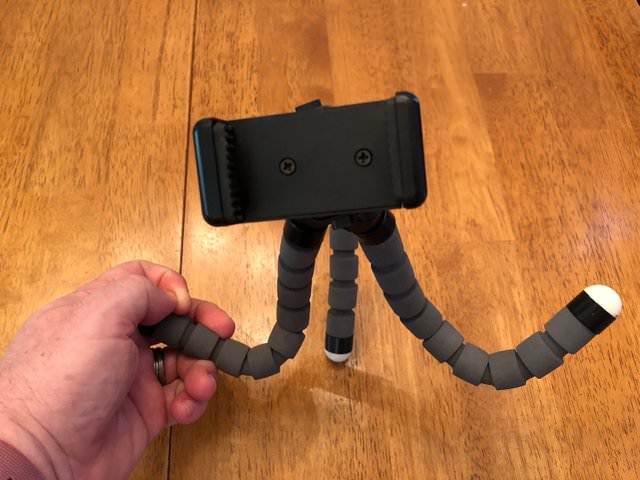
Here is what I'm using to capture the video you've seen above. It cost me $17 and I've folded the arms in a configuration that keeps it steady and in front of my face without blocking my screen too much. This holds the camera vertically and the arms are bent for maximum screen and support.
UBeesize Tripod S
https://www.amazon.com/UBeesize-Tripod-Phone-Flexible-Compatible/dp/B07837W5NX
In the future, I'm sure that PCs will have these kinds of TrueDepth camera built into the monitors themselves so it won't have to be such an extra step or inconveniently hang in front of your face.
Summary
With the recipe above, you'll be able to easily add custom Pixar-like avatars to your stream that sync and move to your face. I expect a large variety of apps in the future that let you create more dramatic puppets with a huge catalog of accessories or animations that you'll be able to make your stream that much more enjoyable.
Send me a note if you need some help with the app or have used this technique for your own stream. Would love to see how this is implemented. Thanks for reading.
